Embroidery For Beginners

Learn How to Embroider

  • Home
  • Contact
  • Basic Stitches
    • Back Stitches
    • Blanket Stiches
    • Chain Stitches
    • Chevron Stitches
    • Feather Stitches
    • Fishbone Stitches
    • Fly Stitches
    • Herringbone Stitches
    • Knots
    • Running Stitches
    • Satin Stitches
    • Stem Stitches
    • Straight Stitches
    • Weaving Stitches
  • Embroidery Designs
  • About

Basque Stitch, How to work a basque stitch (step by step & video)

February 5, 2019 By fasembroidery Leave a Comment

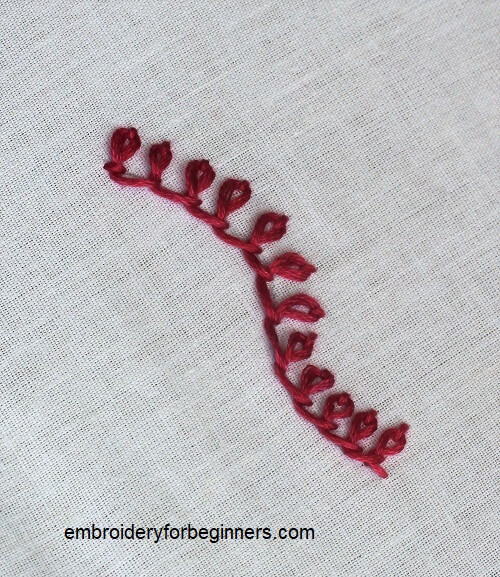
Basque Stitch is a stitch that is part of the chain stitch family. It is beautiful and makes wonderful designs if you know how to work it. This stitch might look complicated but it will get pretty easy once you get the hang of it. 

basque stitch

Why the name Basque?

It is said to have been originated in the Basque region of Spain. If you are one who fancies embroidery then you can take the old embroidery patterns of Southern France, Spain, and Portugal. You will find lot of designs made with this stitch.

What you will need?

  • Any fabric.
  • Embroidery hoop, 15cm (6″) (Bigger if you are working on a larger design)
  • Tapestry needle
  • Embroidery thread

How many strands of floss do you need for making the Basque stitch?

You can use all 6 strands of the floss. But if you are working on a finer design, then start with 2 strands of floss and increase the number of strands according to your design.

Step by Step Pictorial Process of making the Basque stitch

starting basque stitch

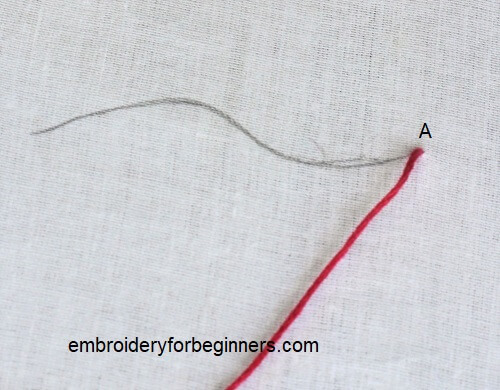
1. Insert the needle from below the fabric at point A.

inserting needle through the fabric

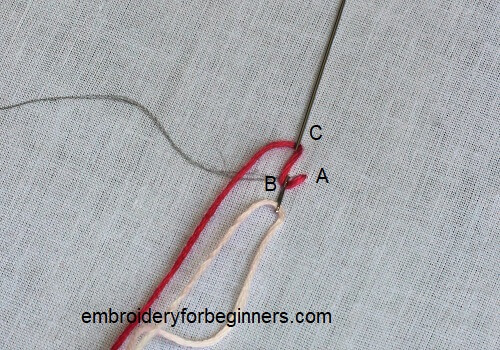
2. Pull the thread up and insert at point B and bring it out at point C.

making a twisted chain stitch

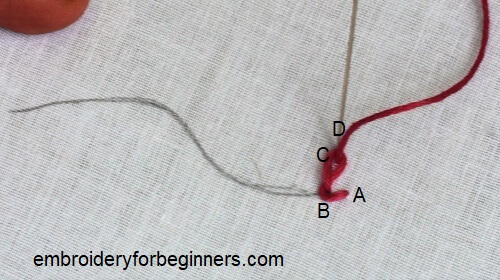
3. Gently pull the thread and push down the needle outside the stitch at point D.

making one chain

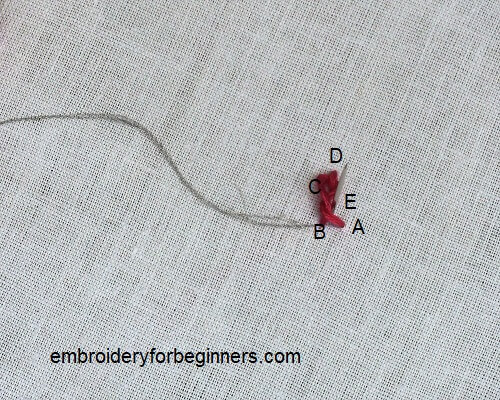
4. Bring it out at point E and start on the next stitch in a similar fashion.

bringing needle up the fabric

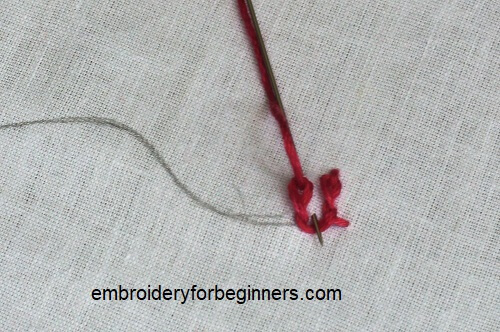
5. You can insert the needle from point D to Point E without pulling the thread down

finishing basque stitch

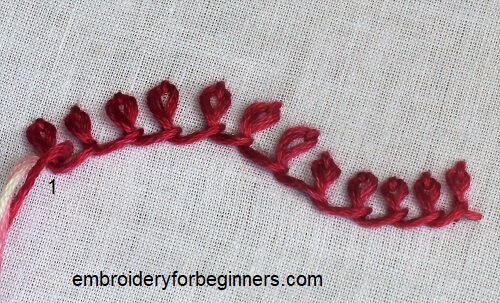
6. End the stitch at point 1.

Tips for working the Basque stitch

  • Do not pull the thread too tightly.
  • Just work on the stitch with a free hand.

What is the Basque stitch used for?

  • It can be used to make beautiful borders with this stitch.
  • Flowers, circles, many kinds of patterns can be formed with this stitch on a dress, motif, quilt, etc.

More stitches:

  • Feather Stitch
  • Parallel Running Stitch
  • Double Feather Stitch
  • Long and Short Stitch
  • Trellis Stitch
  • Blanket stitch
  • satin stitch
  • back stitch
  • stem stitch

Check out the video tutorial below

So until next time,

Keep Stitching,

Fareeha

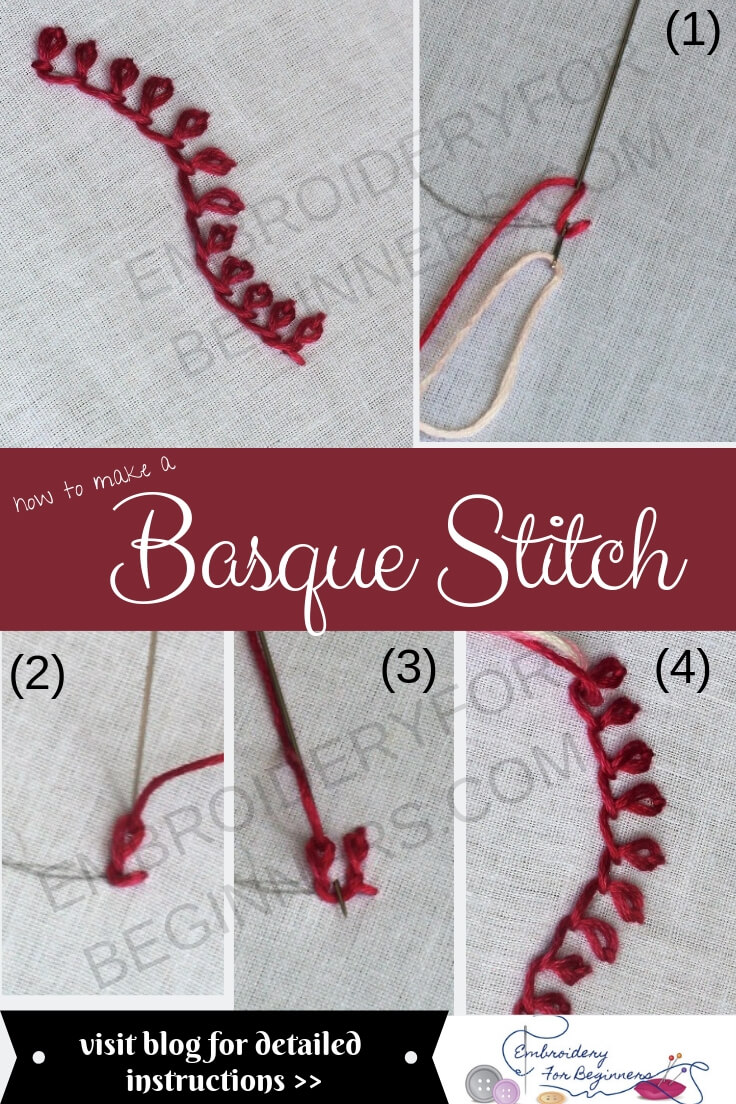
Pin this image for later reference:

learn how to basque stitch with step by step pictures

Tweet
Pin36K
Share
36K Shares

Filed Under: Basic Stitches, Chain Stitches Tagged With: basic stitches, chain stitch

« Feather Stitch, How to make a feather stitch (Step by Step & Video)
Cast On Stitch, How to work a cast on flower (Step By Step & Video) »

Leave a Reply Cancel reply

Your email address will not be published. Required fields are marked *

Join Our Facebook Group

Categories

  • Back Stitches (7)
  • Basic Stitches (118)
  • Blanket Stiches (13)
  • Chain Stitches (24)
  • Chevron Stitches (4)
  • Couching (1)
  • Cretan Stitches (3)
  • Cross Stitches (2)
  • DIY (8)
  • Embroidery Designs (14)
  • Feather Stitches (9)
  • Fishbone Stitches (5)
  • Fly Stitches (4)
  • Herringbone Stitches (4)
  • Jewelry Making (5)
  • Knots (23)
  • Palestrina Stitches (2)
  • Ribbon Flowers (2)
  • Running Stitches (9)
  • Satin Stitches (10)
  • Stem Stitches (7)
  • Straight Stitches (12)
  • Weaving Stitches (8)

Like Us

Join Our Facebook Group

Follow Us

Follow Us

About FAREEHA

I am the developer, writer, and photographer behind this blog, “Embroidery For Beginners”.

You can learn more about me here.

© 2019 Embroidery For Beginners. All Rights Reserved. Pricacy Policy, Disclosure & Disclaimer Site Map