Fly stitch is also known as Y stitch or open loop stitch. If you see the images below, you will realize the reason why it is called so. It is a very easy stitch especially if you know how to make the lazy daisy stitch.
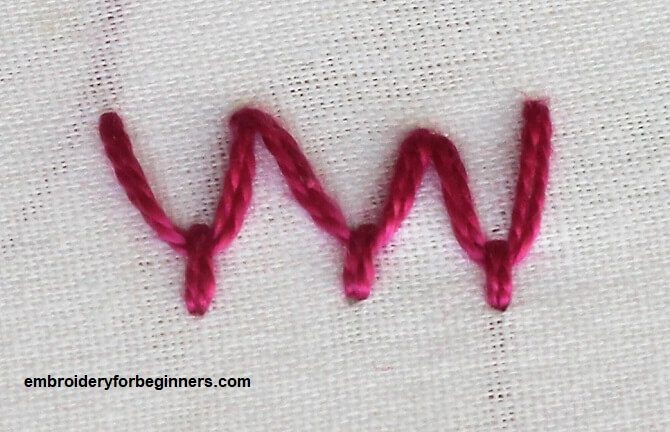
It is a holding stitch that can be made into a Y or a V shape. A lot of designs can be incorporated with the fly stitch horizontally, vertically or in a curve.
WHAT YOU WILL NEED?
- Any fabric.
- Embroidery hoop, 15cm (6″) (Bigger if you are working on a larger design)
- Tapestry needle
- Embroidery thread (I have used the pearl cotton floss for this tutorial)
How many strands of floss do you need for making the fly stitch?
Since I have used the pearl cotton floss, I have taken double floss for it. But if you take general embroidery floss for the pattern, then you can use all 6 strands of floss. But if your design calls for finer details then reduce the number of strands accordingly.
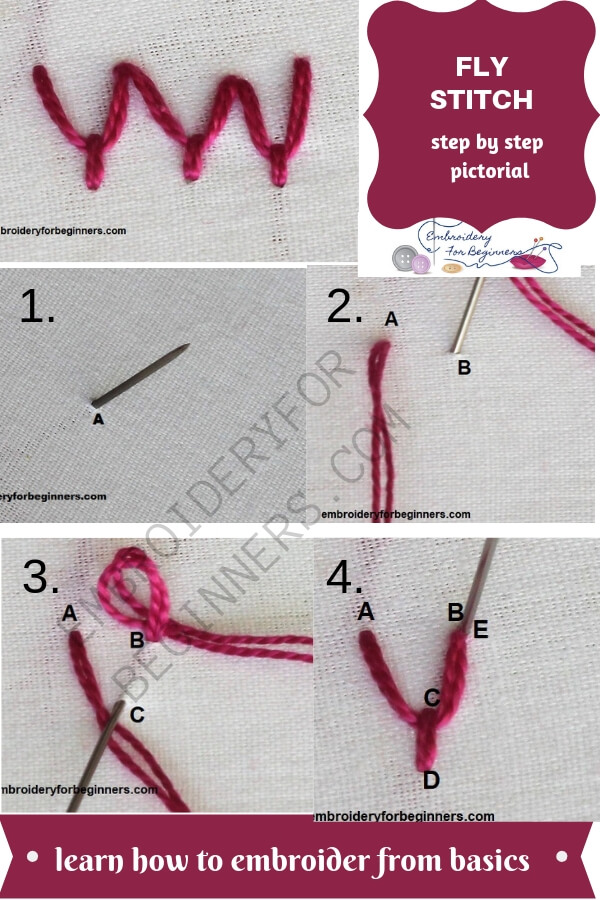
Step by Step Pictorial Process of making the Fly Stitch

- Start by bringing the needle up from beneath the fabric at point A. Insert from the top at desired length at point B.
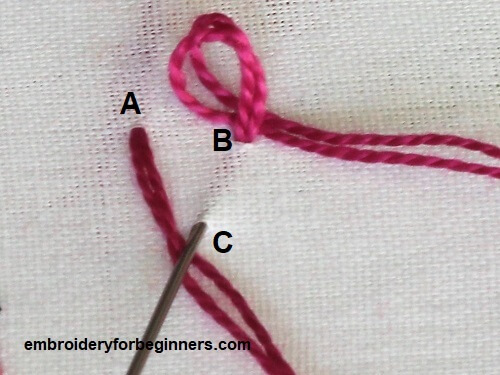
2. Do not pull the thread down. Hold the needle and bring it up at point C. Keep the floss under the needle as shown above.
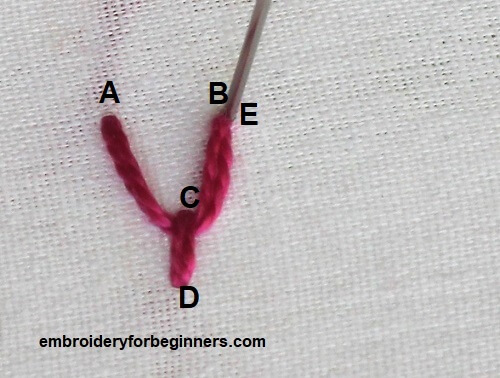
3. Bring it over the floss and take down the needle at point D. Pull the thread down and work in similar fashion for rest of the design. In the above example, I have made a vertical row and hence brought the needle up at point E, that is just beside Point B.
TIPS FOR WORKING THE fly stitch
- You can work the fly stitch horizontally, vertically or in a curve.
- It can be made more beautiful by using contrasting color threads.
WHAT IS THIS STITCH USED FOR?
- Beautiful stems can be made with this stitch.
- You can also fill the pattern in a way that other stitches don’t reach.
- As you keep working the fly stitch, you will learn more and more ways of incorporating it.
More stitches:
Check out the video tutorial below
So until next time,
Keep Stitching,
Fareeha
Pin this image for later reference:

Leave a Reply