Embroidery For Beginners

Learn How to Embroider

  • Home
  • Contact
  • Basic Stitches
    • Back Stitches
    • Blanket Stiches
    • Chain Stitches
    • Chevron Stitches
    • Feather Stitches
    • Fishbone Stitches
    • Fly Stitches
    • Herringbone Stitches
    • Knots
    • Running Stitches
    • Satin Stitches
    • Stem Stitches
    • Straight Stitches
    • Weaving Stitches
  • Embroidery Designs
  • About

Raised Fishbone Stitch in Hand Embroidery (Step By Step & Video)

February 18, 2019 By fasembroidery Leave a Comment

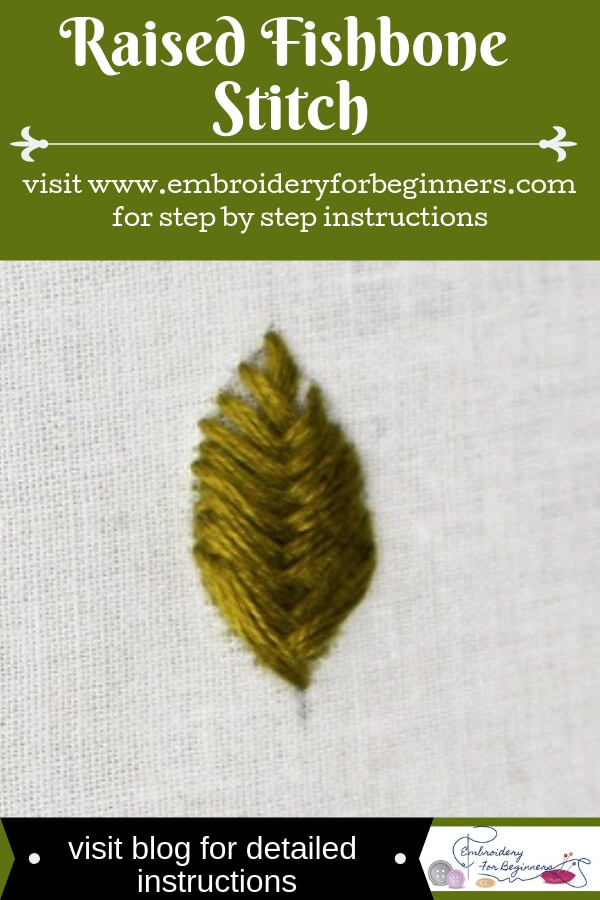
Raised Fishbone Stitch is an ideal stitch for filling the leaves. We will have to divide it into two parts and then work on it. You might be confused with this stitch as satin stitch too. But if you look closer, you will notice it will resemble a fishbone and hence the name. Check out the herringbone stitch too.

fishbone stitch

What you will need?

  • Any fabric.
  • Embroidery hoop, 15cm (6″) (Bigger if you are working on a larger design)
  • Tapestry needle
  • Embroidery thread

How many strands of floss do you need for making the raised fishbone stitch?

You can use all 6 strands of the floss. But if you are working on a finer design, then start with 2 strands of floss and increase the number of strands according to your design.

Step by Step Pictorial Process of making the raised fishbone stitch

starting the fishbone stitch

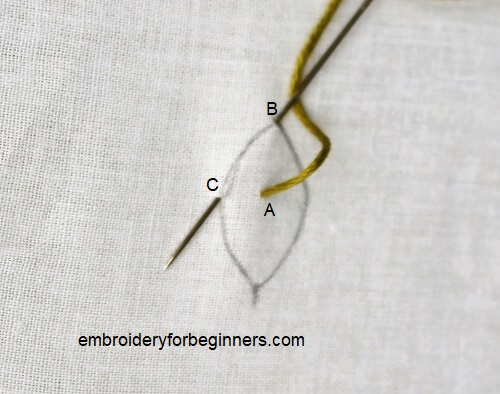
1. Start by bringing the thread up right in the middle at point A. Insert at point B and without taking it down bring it out at point C. Pull the thread up.

working on fishbone stitch

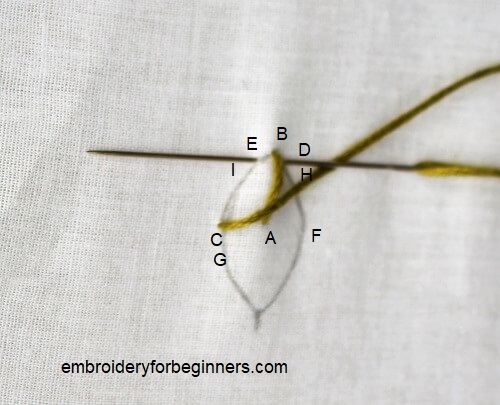
2. Insert at point D and bring it out at point E. Take it down at point F and bring it out at G. Again, take it down at point H and bring it out at point I.

ending the fishbone stitch

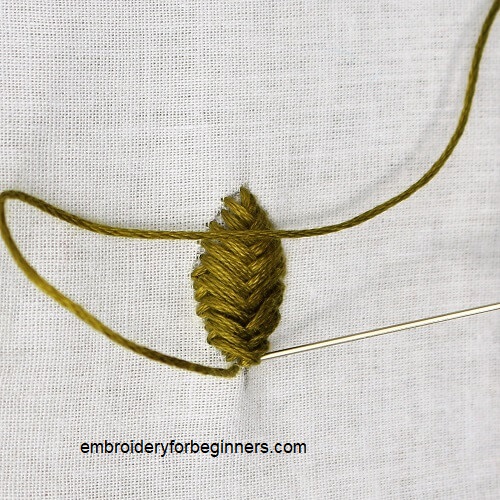
3. Finally, end the stitch and secure the thread with the knot.

Tips for working the raised fishbone stitch

  • Divide the working area into two sections and work on it.

What is this stitch used for?

  • It can be used for filling the flowers, leaves or any patterns.

More stitches:

  • Maidenhair stitch
  • Wheatear Stitch
  • Fern Stitch
  • Cast On Stitch
  • Basque Stitch
  • Long and Short Stitch
  • Trellis Stitch
  • Blanket stitch
  • satin stitch
  • back stitch
  • stem stitch

Check out the video tutorial below

So until next time,

Keep Stitching,

Fareeha

Pin this image for later reference:

learn how to work a raised fishbone stitch

Tweet
Pin25K
Share
25K Shares

Filed Under: Basic Stitches, Fishbone Stitches Tagged With: basic stitches, fishbone stitches

« Double Threaded Running Stitch in Hand Embroidery (Step By Step & Video)
Magic Chain Stitch in Hand Embroidery (Step By Step & Video) »

Leave a Reply Cancel reply

Your email address will not be published. Required fields are marked *

Join Our Facebook Group

Categories

  • Back Stitches (7)
  • Basic Stitches (118)
  • Blanket Stiches (13)
  • Chain Stitches (24)
  • Chevron Stitches (4)
  • Couching (1)
  • Cretan Stitches (3)
  • Cross Stitches (2)
  • DIY (8)
  • Embroidery Designs (14)
  • Feather Stitches (9)
  • Fishbone Stitches (5)
  • Fly Stitches (4)
  • Herringbone Stitches (4)
  • Jewelry Making (5)
  • Knots (23)
  • Palestrina Stitches (2)
  • Ribbon Flowers (2)
  • Running Stitches (9)
  • Satin Stitches (10)
  • Stem Stitches (7)
  • Straight Stitches (12)
  • Weaving Stitches (8)

Like Us

Join Our Facebook Group

Follow Us

Follow Us

About FAREEHA

I am the developer, writer, and photographer behind this blog, “Embroidery For Beginners”.

You can learn more about me here.

© 2019 Embroidery For Beginners. All Rights Reserved. Pricacy Policy, Disclosure & Disclaimer Site Map