Straight Stitch has to be the most basic stitch in embroidery. It is a simple stitch that is made in a straight line.
It is either made individually or in groups to form a pattern. If you know how to bring the needle in and out of the fabric, then you are good to make this straight stitch. It is the most simple and most basic of all stitches. This stitch can be called the foundation of the stitches.
In all probability, if you are new to embroidery or sewing, you will be taught to work this stitch. It is easy, simple and yet very important that no embroidery can do without.
What you will need
- Fabric
- Embroidery hoop, 15cm (6″)
- Tapestry needle
- Embroidery thread
Step by Step photo process of how to work a straight stitch
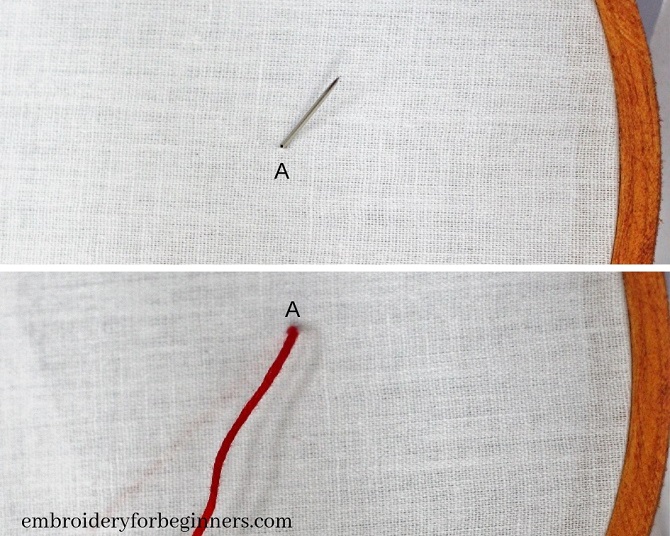
- First, start by bringing the needle up at point A.
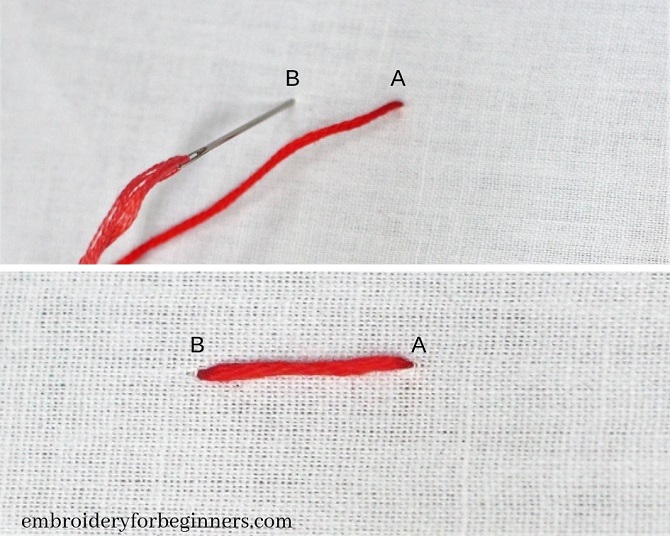
- Then take it down at your desired distance at point B.
- Pull down the thread. You have made a straight stitch from point A to Point B.
- You can either knot the thread at the back and cut the thread or make as many straight stitches as you like.
How many strands of floss should I use making this stitch?
In basic embroidery patterns, you will need all 6 strands of floss to make the straight stitch. But if your design calls for finer details and to manage refined designs, you will need one strand. If you are making an outline for a pattern, you can start with 3 strands.
What is a straight stitch used for?
- Most stitched begin by making a straight stitch. A series of detached straight stitches form a running stitch.
- If you are making ribbon embroidery, a single straight stitch will make excellent flower buds.
- You can use a straight stitch to create negative space. Work this stitch all around a pattern that has been outlined with back stitch!
- You can also make flowers, outlines, alphabets with this stitch.
Pin it for later reference!


Leave a Reply