Running stitch is simple needlework that is the most basic stitch that you will learn after the straight stitch. If you know how to make the straight stitch, then you can easily make this running stitch as well.
It can either be used in a straight line or curved lines. In all probability, you are like to learn this as your first stitch in any sewing or embroidery class.
What you will need?
- Fabric
- Embroidery hoop, 15cm (6″)
- Tapestry needle
- Embroidery thread
How many strands of floss should I use for making the running stitch?
In basic embroidery patterns, you will need all 6 strands of floss. If you are making an outline for a pattern, you can start with 3 strands. But if you are making this running stitch for sewing, then you can use the normal thread with single or double thread.
How to work running stitch?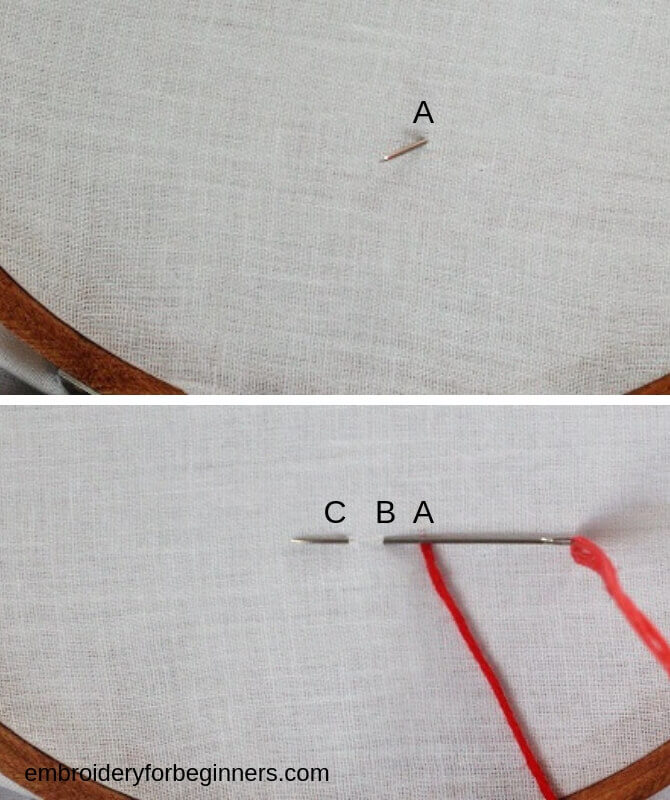
- Bring the needle up at point “A”
- Then take it down at desired length at point “B”.
- Again, bring up at desired length at point “C”.

- Keep working like this, up and down, at desired lengths.
How do I carry the thread from one place to another?
If you are stitching in an area that is far away from your current working I would recommend fastening off the knot and cutting the thread. Then restarting from where you want to stitch.
However, if you are going to work on only a short distance, then you can use the outlines of the back stitches. Flip over your hoop to the wrong side and work your thread through the outlines of the thread to reach to the place where you want to bring the needle up.
Do not try to carry the thread from one place to the other directly without using outlines as it may show on the front side of your design. And that really looks untidy.
What is a running stitch used for?
You can use this running stitch for a variety of designs. From outlines to borders to filling the pattern, you can run your imagination for using this stitch in any design that you want.
Check out the video below:
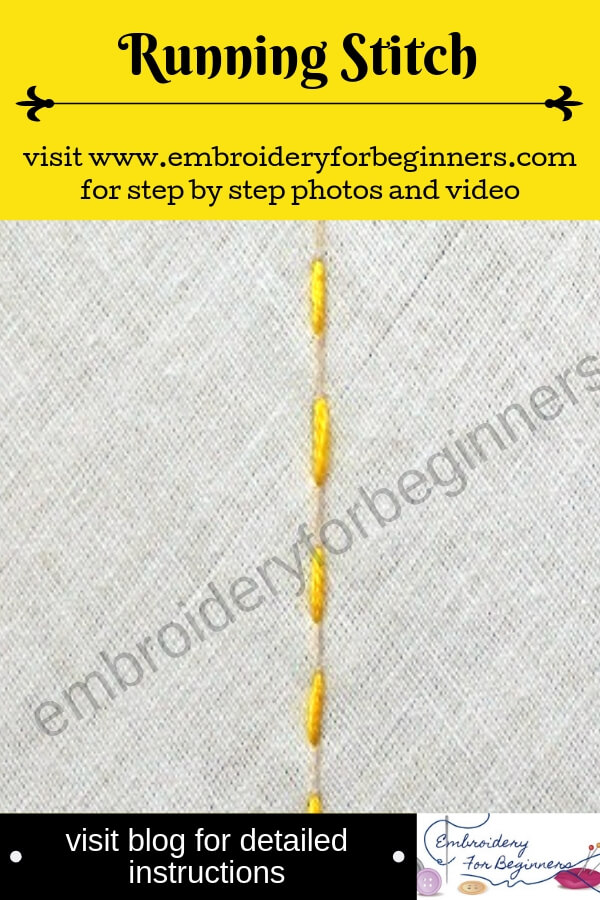
Pin it for later reference:
So until next time,
Keep Stitching,
Fareeha

Leave a Reply