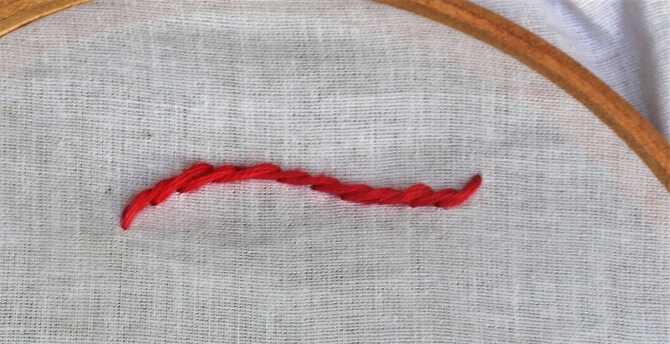
Stem Stitch is another of the important stitches in hand embroidery. Easy to make and elegant to look. The stem stitch looks really awesome when used in embroidery patterns. This is different from the back stitch.
WHAT YOU WILL NEED?
- Any fabric. There are no restrictions for making this stitch.
- Embroidery hoop, 15cm (6″) (Bigger if you are working on a larger design)
- Tapestry needle
- Embroidery thread
HOW MANY STRANDS OF FLOSS SHOULD I USE FOR MAKING THE STEM STITCH?
Depending upon the type of design and thread you are using, you can adjust your number of strands. For the below pictorial I have used all 6 strands of floss.
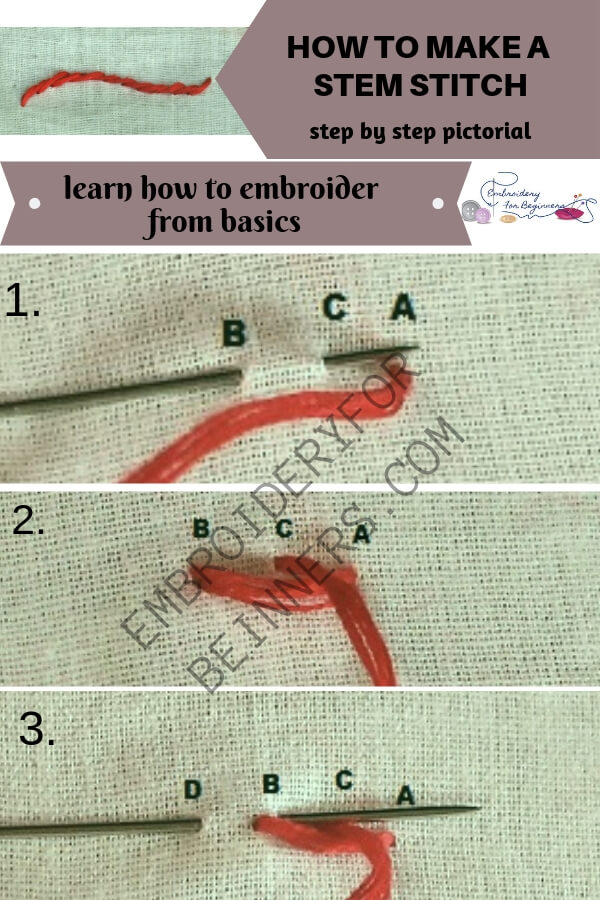
Step by Step Pictorial Process of making the Stem Stitch
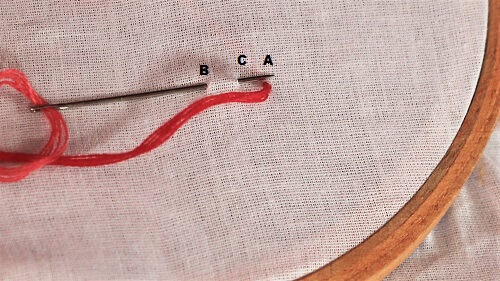
1. Start by inserting the needle at point A and bring the thread up. Turn the needle over and insert the needle from point B to Point C. Note that the point C is the middle point of point A and Point B.
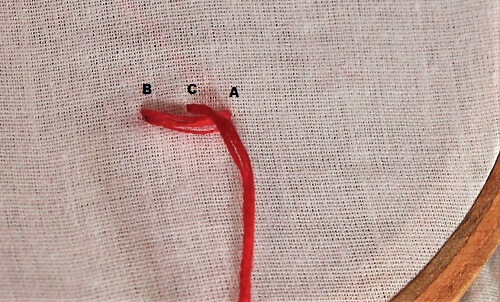
2. Bring the needle up and point C and pull the thread up.
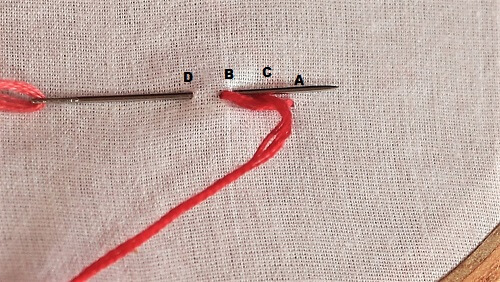
3. Again turn the needle and insert at point D to point B. Continue working like this for the rest of the pattern.
Tips for working the stem stitch
- Just remember that you have to insert your needle at your desired length and bring it up at the previous stitch. You will be able to understand the stitch better with the video tutorial. Please check below.
- Always pull the thread on the other side of the stitch while inserting the needle.
What is this stitch used for?
- If you learn this stitch, there is no limit how you can use this stitch. From frocks to quilts to cushion covers, you can work this stitch on almost anything on everything. Motifs, handbags, dresses, fill any design with this stitch.
- This stitch is just perfect for stems, curved lines etc.
- Silk thread can be used and beautiful design can be made using this stitch for a wedding dress too.
Check out the video tutorial below
So until next time,
Keep Stitching,
Fareeha
Pin this image for later reference:

Biose katherine says
This is very helpful