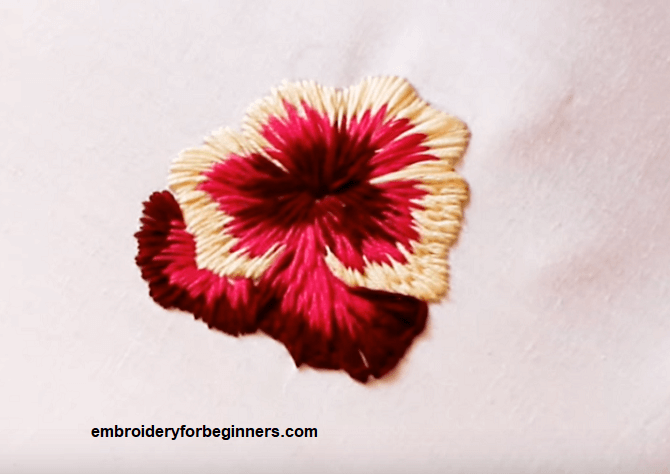
Long and short stitch is also known as thread painting or needle painting. It is a beautiful stitch that is used to fill flowers or designs. Just like the satin stitch, this is a time-consuming stitch.
It is a very beautiful stitch that is very rewarding when you finish the design. The outcome of this stitch is really awesome. If you have some patience, you will end up with a very satisfying design.
WHAT YOU WILL NEED?
- Any fabric.
- Embroidery hoop, 15cm (6″) (Bigger if you are working on a larger design)
- Tapestry needle
- Embroidery thread (I have used the pearl cotton floss for this tutorial)
How many strands of floss do you need for making the long and short stitch?
Since I have used the pearl cotton floss, I have taken double floss for it. But if you take general embroidery floss for the pattern, then you can start with 2 strands of floss and increase the number of strands according to your design. The lesser the strands, the finer the design will be.
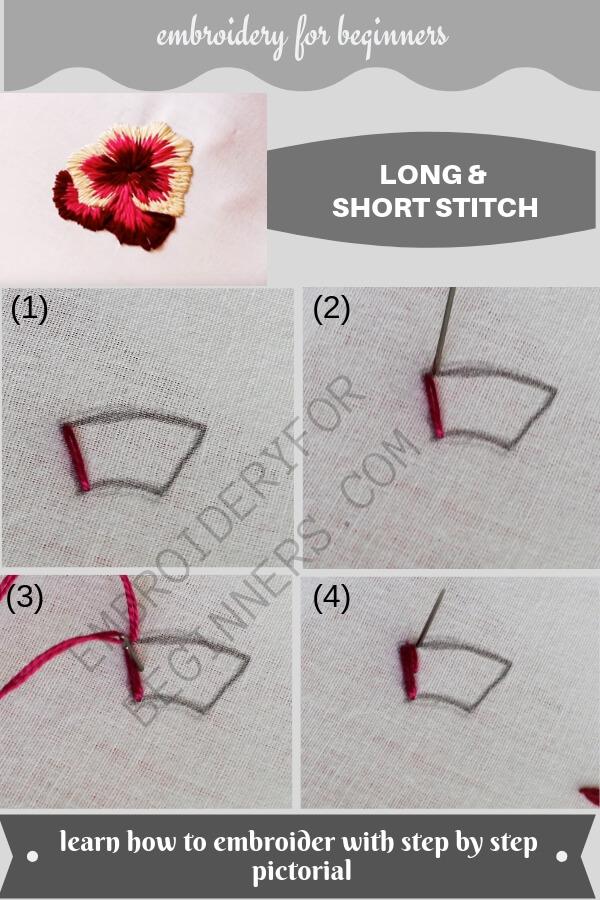
Step by Step Pictorial Process of making the long and short Stitch
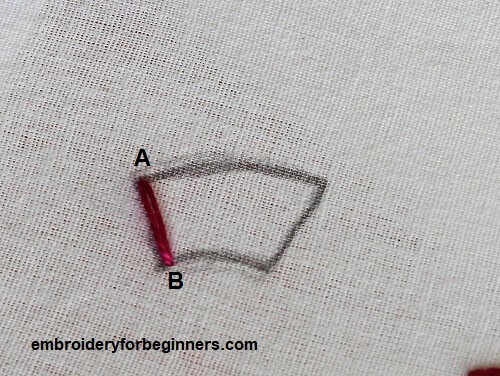
1. Start by inserting the needle from below the fabric at point A. Make a straight stitch at Point B at your desired length.
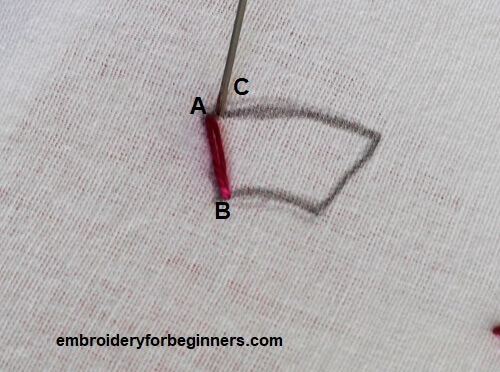
2. Take the thread down at point B and bring it up at point C, that is just beside Point A.
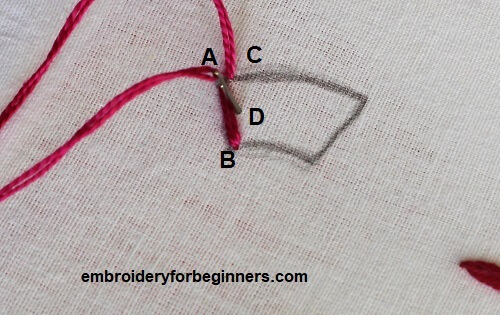
3. Make a shorter stitch at point D. This should be shorter than the previous stitch.
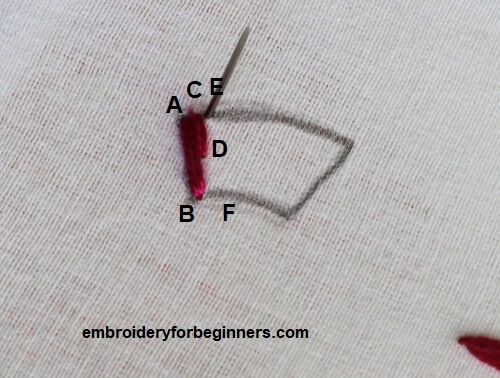
4. Keep working in similar fashion for the rest of the stitches by making one long stitch and one short stitch.
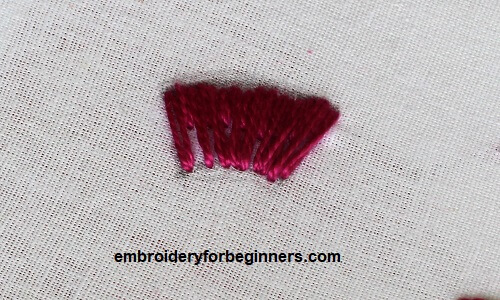
5. Work until the end of the design. One row is completed. If you want to fill a design, work on the second row in a similar fashion. You can check the video for easier reference.
Tips for working the long and short stitch
- You can start by outlining your design with back or stem stitch and then working on the long and short stitch.
- Various colors can be used to achieve a great effect on the design like the one shown above.
WHAT IS THIS STITCH USED FOR?
- This stitch is a great way to fill any design.
- You can make beautiful flowers, leaves and almost anything with this long and short stitch.
More stitches:
Check out the video tutorial below
So until next time,
Keep Stitching,
Fareeha
Pin this image for later reference:

Leave a Reply