Bullion Knot is a very pretty stitch, mastering which leads you to make beautiful embroidery. It is also known as caterpillar stitch, coil stitch or worm stitch. If you know how to make a french knot, then you can easily master this knot too.
WHAT YOU WILL NEED?
- Any fabric.
- Embroidery hoop, 15cm (6″) (Bigger if you are working on a larger design)
- Tapestry needle
- Embroidery thread (I have used the pearl cotton floss for this tutorial and general embroidery floss for the flower design below.)
How many strands of floss do you need for making the bullion stitch?
Since I have used the pearl cotton floss, I have taken double floss for it for the tutorial But for the embroidery flower design, I have taken all the six strands of floss. You can start with 2 strands of floss and increase the number of strands according to your design. The lesser the strands, the finer the design will be.
Step by Step Pictorial Process of making the bullion knot.
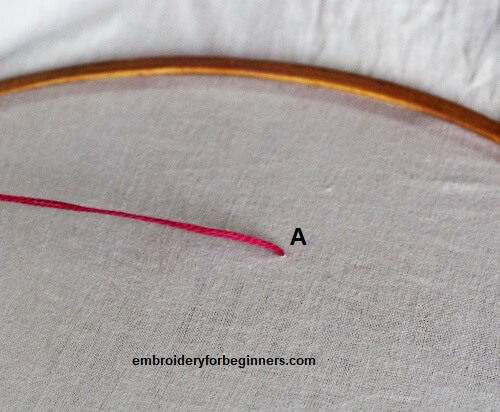
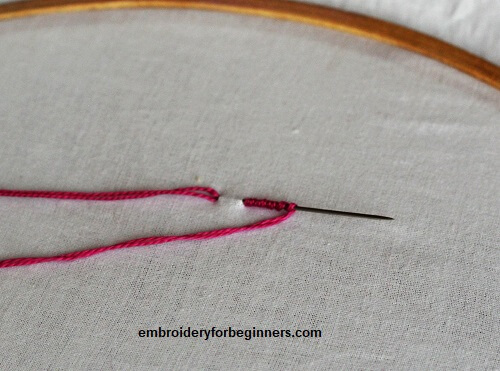
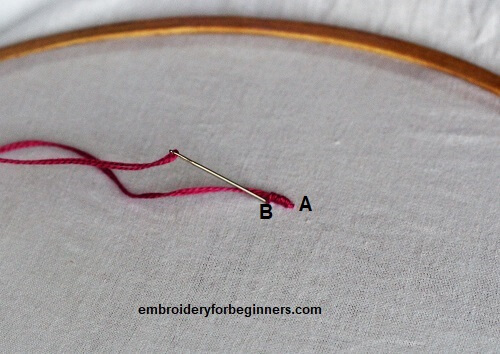
1. Start by bringing the thread up at point A from below the fabric.
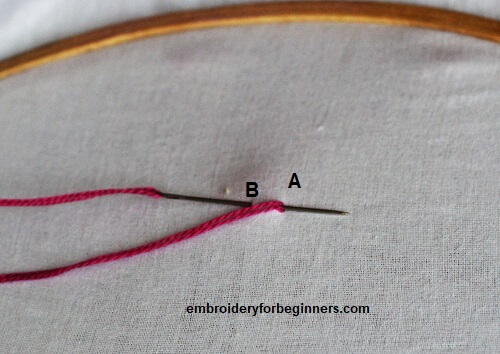
2. Insert the needle at point B. Do not take down the needle and push it through to point A again like shown in the picture above.
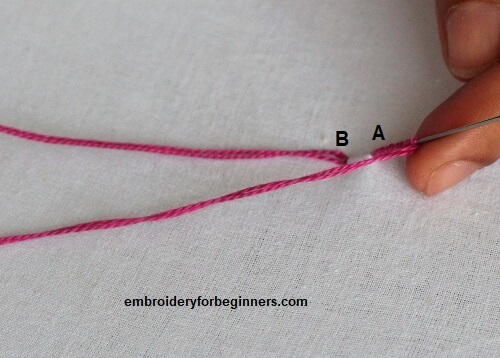
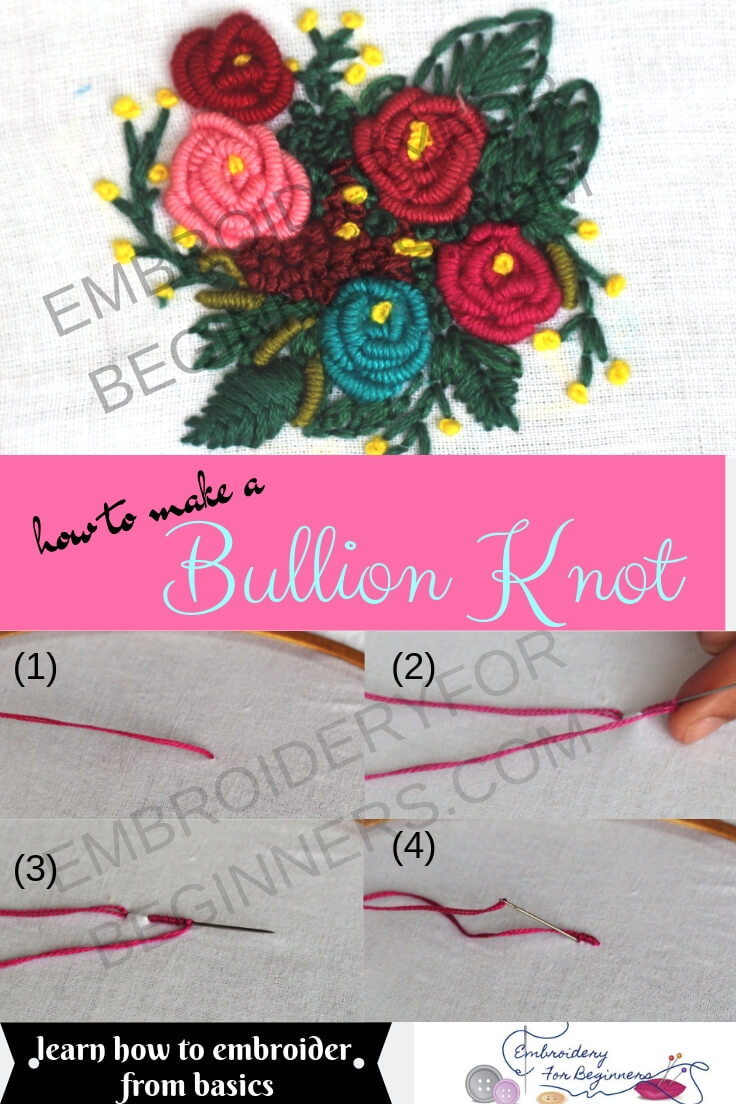
3. Hold the needle and wrap the thread around the needle at least 6 times.
4. The knots should neither be too tight or too loose. Hold the loops between the fingers and pull the needle and the thread along with it. You can refer the video reference below for easy understanding.
5. Insert the needle down the fabric at point B again and secure a knot.
Tips for working the bullion knot
- Use the right needle for this stitch. If you use a shorter needle, it will be difficult to hold the loops.
- Loop the thread around the needle with right tension. If you wrap loosely or too tightly, you will end up with bizarre looking knots.
- Hold the loop while pulling the thread.
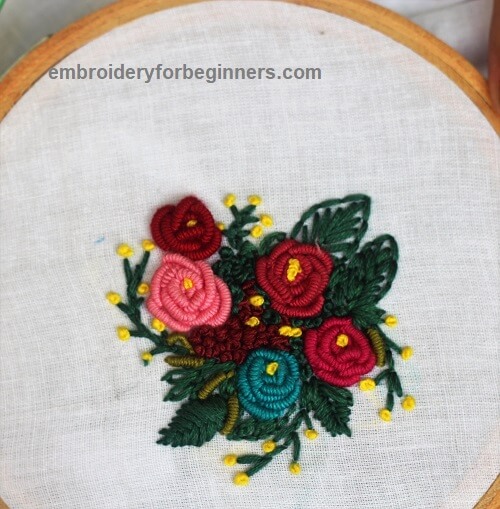
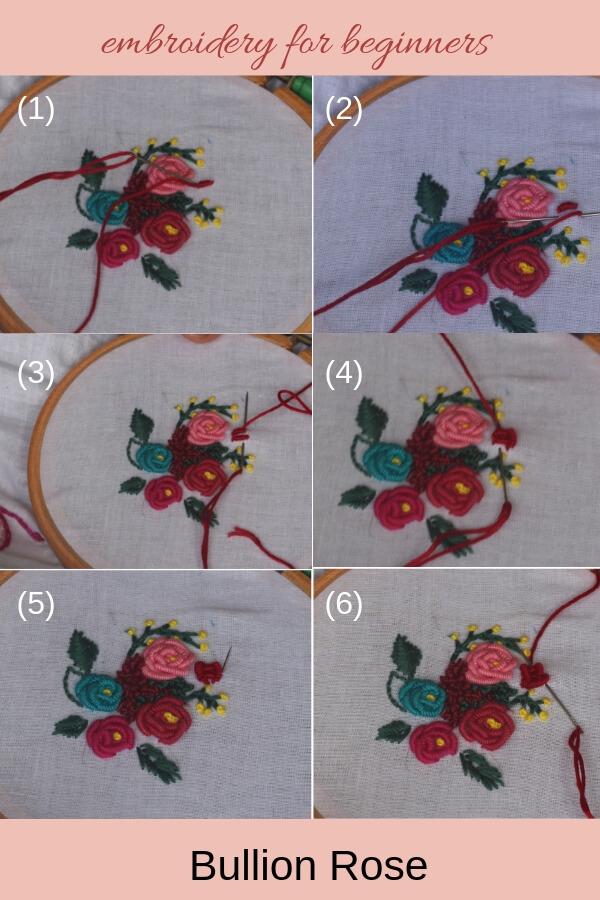
Check out the following tutorial for making the bullion roses.
WHAT IS THIS CATERPILLAR STITCH USED FOR?
- Beautiful flowers can be made with this stitch. Roses look amazing with the bullion knots.
- You can even make buds or lazy daisy with this stitch.
More stitches:
Check out the video tutorial below
So until next time,
Keep Stitching,
Fareeha
Pin this image for later reference:

Sherie Rodrigues says
Dear Fareeha, my name is Sherie. I wanted to say to you, how special I think you are. I don’t, can’t, embroider, yet, but when I do I will be learning from you. Your time and expertise are very appreciated. Thank you, you are one of the good people. Good health and happiness to you and your family. Sherie
fasembroidery says
Dear Sherie,
Thank you so much for stopping by. You have no idea how much your comment meant to me. I had a broad grin all day long.
I hope you start embroidering soon and enjoy it as much as I do.
Once again thanks for your wonderful comment. <3
Sophia says
Dear Fareeha, I have been watching and savingg as many of your video tutorials as i can get my greedy hands on..who knows how many are in my collection? I begin looking with the idea that i will begin a project and am just fine tuning some ideas. Then i notice the day has gone by and I have accomplished nothing except hungrily saving as many of your lessons as I can. It is so addicting watching bow easily you do this. I am excited to try practicing first while deciding what to do. As of yet I have only used inexpensive felt. So I ask what trpe of cloth should i look for to start with? I would like to do just a piece of art, as opposed to something useful. I would very much appreciate your advice, as would many others I am sure.
Thank you for opening my mind to this beautiful world.
Sincerely, Sophia